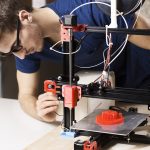
Have you ever been in a set of circumstances when your Creality 3D Printer is not creating good enough prints? It can be frustrating. However, most of the time, it happens due to an overused nozzle.
In fact, most of the issues caused to your 3D printer can be fixed by simply replacing the worn-out nozzle with a new one.
For that reason, in this article, we are going to talk about how we can replace the creality 3D printer nozzle in the best possible way, and we will also talk about why the nozzle may need to be changed.
The minute you have read this article, you will be able to replace the creality 3D printer nozzle in no time without affecting any other thing. So let us get going and see how we can do it.
Why would you need to change the nozzle?
The nozzle is the part of the 3D printer that is responsible for extruding the filament to make a print. The nozzle may reduce the functionality of the 3D printer if it gets clogged.
You can also clean the nozzle with a cleaning kit, but the cost of replacement of a brass nozzle is relatively cheap; hence, it is best for you to replace it.
But in the case of steel or ruby nozzle, it is best said that you must try to clean it out yourself as the cost to replace those is a lot higher.
Have you ever noticed a dimensional inaccuracy in the prints? Chances are you have. If you use a brass nozzle, it is a lot likely for it to have nozzle wear which can cause such issues. However, if you use a nozzle with a ruby tip, it is unlikely to happen.
If you are continuously changing filament types, you must change the nozzle as well. Otherwise, it might need to get replaced. In order to print a carbon filament, you might need to change your nozzle from brass to hardened steel.
How to replace the nozzle?
Replacing the nozzle can be risky, but if you follow the steps correctly, you can do it easily. Here is the complete process of replacing a nozzle on your 3D printer:
Tools
In order to replace the nozzle to get the best results out of the 3D printer, a crescent wrench or a small open wrench, Allen key, and cutting pliers are essentially the only three things you need.
Steps
Before you attempt to proceed with the task, make sure that all the cables, which connect to the central computer of the 3D printer, are unplugged. You should not try to disassemble or replace anything when the wires are plugged in.
Removing the old nozzle
- The first step is to remove the filament from the nozzle. In order to do so, heat the nozzle to 230° (when the nozzle is heated, it becomes loose, so unscrewing it becomes easier).
When the temperature reaches 230°, carefully remove the filament until it is completely removed from the nozzle. Note that after doing this, you must use cutting pliers to remove any line of filament that is still connected with the nozzle.
- The following step is to remove the protective fan casing. You will see two 5.5mm screws on the top of the casing. In order to remove those screws, you have to use a 2mm Allen key. Carefully remove both the screws and detach the casing. The casing has external wires; make sure to place it somewhere safe where the wires are not damaged in any way.
- You will see an insulation cover over the nozzle. Remove it with an open wrench or any other tool, but do not touch it with your bare hands.
- In the newer models of the Creality 3D printers, there is a red assembly above the nozzle, and it acts as a protective layer over the heater block. You can either remove the red assembly as a whole, or you can remove the nozzle directly. In order to remove the assembly, you need to unscrew the two bolts at the top with a 2mm Allen key.
- The next step is to remove the nozzle from the assembly. You can do this by using a crescent wrench or an open wrench. Gently unscrew the nozzle from the assembly by rotating it, and when it becomes loose enough, you can use your hands to remove it completely.
Attaching the new nozzle
- Once the nozzle has been removed, you need to install the new nozzle into the nozzle assembly. Wait for a few minutes as the temperature of the heater block might still be high. Screw-in the nozzle first by hand and rotate it a couple of times. When it is in its space, heat the nozzle again to 230°, turn the heat off and tighten it with a wrench gently, do not tighten it with extreme force as it might detach again.
- Once the new nozzle has been installed into your 3D printer, adjust the level of your print bed as changing nozzle changes how close by the nozzle is to the print bed.
- You must check the new nozzle for any leaks.
Start to print
- The old worn-out nozzle has been replaced by a new nozzle; print something with your Creality 3D Printer to test the new nozzle out!
Choosing the best nozzle
Choosing a suitable and appropriate nozzle is essential, and you must take your time in deciding the best suitable option. Mainly, there are three significant aspects to look for in a nozzle.
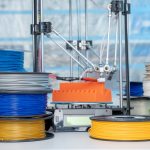
The first thing is the size of it; the bigger the size, the larger the surface area will be covered. Secondly, the material of which it is made; it can be brass, stainless steel, or any other material.
It influenced on the type of printer you have and the filament material you are going to work with. At last, the inner diameter of the nozzle, it is what decides the speed flow of your print.
If you replace a nozzle of a smaller diameter such as 0.2mm, or 0.4mm with a nozzle of a larger diameter such as 0.8mm, you should change a few settings.
The layer height must be increased, and the printing temperature should be increased as well. Decreasing the print speed is also advised.
By doing so, the plastic is given sufficient time as well as enough temperature to melt properly and produce good quality prints.
This article is what you all need to get the required information and knowledge about the Creality 3D printer nozzle replacement.
Hassan Khan
Hassan Khan is a leading voice when it comes to the innovative world of additive manufacturing. A mechanical engineer by training, Hassan quickly recognized the transformative potential of 3D printing, diving headfirst into the intricacies of printer design, filament research, and software optimization. At CrealityLovers.com, Hassan shares his profound knowledge, from insightful reviews and tutorials to forward-thinking op-eds that forecast the future of 3D printing. Hassan's commitment goes beyond the written word. Hassan Khan aims to empower every reader, from novices to industry experts, ensuring they make informed decisions in their 3D printing endeavors.