After introducing the ender series of 3D printers, Creality has become one of the fastest-growing brands, and the reason for it is that Creality does not compromise on the quality of the machines; rather, it keeps on improving it with advanced features and design.
From the series, one of the most popular 3D printers is Creality ender 3, which brings numerous benefits, features and functions in a compact design.
Creality ender 3 printer gives you high-quality print results with maximum accuracy and precision and also gives you high printing speed.
It works perfectly well with almost all standard filament material, and with a large build volume, you can make any design or 3D model quickly and easily.
Creality ender 3 is a versatile machine and is being used by many industries and trades for different purposes.
Ender 3 is being used by experts, and as well as by beginners; the easy-to-understand user interface makes it the perfect choice for everyone.
Advance features, high performance, and quality results; you get all of these at an affordable price. In short, we can say that ender 3 is a complete package and is one of the best 3D printers to start with.
Having said that, there is one important thing you need to take care of, and that is the assembling process of the machine.

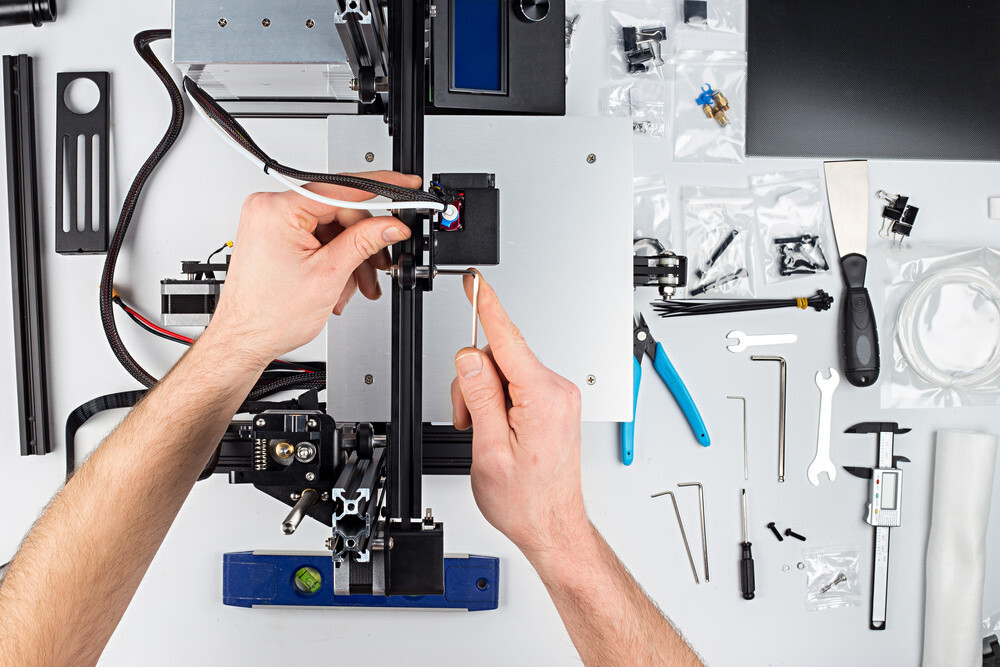
Creality ender 3 does not come assembled, and you have to do it manually. Although it is an easy process, but you need to do it in a perfect manner so that it does not cause any problem during the printing process, and you get the perfect prints in the end.
To make sure that everyone does it in the right way, in this article, we are going to present you with a comprehensive guide and will talk about the Creality ender 3 assembly instructions.
After reading this article, you will be able to assemble your new Creality ender 3 printers on your own within a few hours, and then you can start working with it right away.
What’s included in a box?
To start with the assembling process, you need to know the parts of it which comes within a package, and once you are sure that it contains all the necessary parts and none of it is damaged, you can start assembling it.
Creality ender 3 packages consist of all the required parts, components and necessary tools you need for the assembling process. It will also include a bag of spare parts.
Creality3D is a well-known brand, and they make sure that the package is delivered to you safely and on time.
As you will open the package, you can see that each part of it is covered with a sheet and is properly placed so that none of it gets scratched or broken in any way.
Instructions for Assembling Creality Ender 3
Once you have the complete package in your hands and you have examined it all, you can start with the assembling process.
To make the process easier for you to understand, we can divide it into sections, and you can start assembling it in order. Below you will see the instructions you need to follow for assembling ender 3.
Attach the frames
The first thing you need to do is to assemble the frames. Take out the base of the printer; you will not need to assemble the base as it comes assembled by default.
To attach the frames, you will need to take out the toolbox from the package. Keep the base on the flat surface so that you can place the frames easily and in line.
There will be two frames that need to be attached on each side; each frame will have two nut holes, place the frame in the correct position and then screw the nuts securely. The same goes for the other side of the frame.
Attach brackets
Once the frame is placed accurately, you need to attach the brackets which hold the power supply and LCD screen. Brackets will further secure the frame and will keep it in position and balanced during the printing process.
One bracket will consist of an LCD screen, and you will see holes in the base of the frame where you need to join it.
Place it in an accurate position, match the holes and then screw it with nuts or bolts. Fasten it securely so that it cannot be moved. The same process goes for the other frame brackets consists of a power supply.
Assembling extruder and belt
After the brackets have been installed, you need to install the x-axis where the extruder sits and a belt to control the movement.
The x-axis beam will have pre-drilled holes; you just need to align it with the proper position and screw the bolts. Here you need to make sure that the side with a fan should be facing the front of the machine.
When you will assemble the belt, you will see that there is a pulley on each end of the axis, and you need to bind the belt around. Secure the tensioner, tighten the bolts and make sure that there is no drooping in there.
Wiring assembly
As you are at this stage, you are done with most of the parts; now, you need to set up the wiring of the printer.
But before that, make sure that you have tightened all the screws, nuts and bolts and then proceed further.
There will be one main supply cable that you will need to connect to the electric switchboard; other than that; there will be axis motor cables and extruder motor cables.
Plugin the wires in appropriate sockets and keep in mind that wires match from each side.
Creality ender 3 has the capability to run with 110 volts or 220 volts; make sure that you have configured it and using the applicable switching power supply.
The process of assembling the Creality ender 3 is simple and straightforward, and if you go through these instructions, it will become much easier.
As soon as you are done with the assembling process, you can start printing, but you may need to perform calibrations according to your set of requirements for better results.

