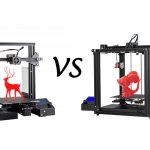
It is because of the distinct feature, reliability, and use of smart technology that makes Creality CR-10 the number one choice for many aspiring 3D printing experts and professionals.
3D printing opens the door of creativity, and with this, you can convert your ideas and imagination into reality.
No matter you have just started learning the art of 3D printing, or you are already working in this field, getting a quality 3D printer is important to get the perfect result in the end.
As a matter of fact, Creality CR-10 has proved to be one of the best printers in all aspects.
From affordability to effectiveness, Creality CR-10 is the best choice to have.
Having said that, 3D printers do not come fully assembled, and therefore, it requires you to manually set up the 3D printer in order to use it for your printing projects.
Creality CR-10 also requires a few steps for assembling, and many of us find it challenging to assemble it perfectly without affecting any element of it.
To make sure that it does not become a hurdle for you, here we are with an article in which we are going to walk you through the process of assembling your new Creality CR-10.
Once you have read this article, you will not find any difficulty in assembling your new Creality CR-10 3D printer.

Assembling Creality CR-10 3D printer
Assembling a 3D printer has always been a hectic task, but if you have the right set of steps and instructions, it is just going to be a piece of cake for you.
Even if you are new to 3D printing, you will find this article user-friendly. Now, let us move towards the assembling process see also CURA settings.
Unboxing the printer
3D printers are transported with care and attention so that none of the parts got any damage. As soon as you receive the package, you need to unbox it and see what is in there for you.
To start with, you need to take out the parts of the printer and put them aside separately. It will mainly include the base of the printer, print bed, binder clips, glass, and other necessary parts.
Sensitive parts such as the print bed will normally be enfolded up in a separate plastic sheet.
Other than that, the package will also include a toolbox, frame of the printer, electronics, and bag of spare parts.
Parts are placed with foam in between so that it can safely reach to you. All of these tools and gears will be helpful in assembling your new 3D printer.
Start with assembling the frame of the printer
Once you have taken out all the parts, make sure that none of it is damaged in any way. The minute we have checked all the components, we can proceed with the assembling process.
The first thing you should build is the frame of the new printer. You will need to assemble the frame with the base of the printer.
Remove the foam and plastic wrap from all the pieces and take out the toolbox. From the toolbox, you will mainly need bolts, washers, and nuts.
Set up the top frame with a base, take help from a friend if needed, and make sure that it is in line and correct position.
To attach the frame with the base, you need to screw the bolts on each side and as well as under the base if there is a hole for nuts.
While doing it, keep the base of the printer on a flat surface so that you can attach the frame correctly and you do not need to unscrew it again.
Attach frame brackets
Once you have screwed bolts in the frame, you need to attach brackets to it to fasten it securely; it is necessary to secure the frame so that it can hold the printer in position while it is running.
The brackets might be different on each side, one containing the electronic switch; therefore, place it accordingly.
There will be four holes for the bolts to be placed on each bracket. Do not leave any of it and tighten them securely.
Attach spool holder and Bowden tube
Once brackets are installed, you can link the spool holder, and then you also need to connect the Bowden tube to the extruder.
Bowden tube is responsible for carrying the filament material from the extruder motor to the nozzle from where it extrudes down to form a print.
By default, it will be connected to the nozzle, but you will have to link it with the extruder yourself.
Attaching is easy and straightforward; the extruder motor will have a metal coupler in which you have to place the tube. Press the tube as long as it can go in connection.
Keep in mind that the Bowden tube has an attached power cable; while you are linking it to the extruder motor, it should not be damaged. For this, you can affix the cable wire with a clip so that it does not get in between.
The package may include the decoration strips, which you can attach to the frame at this stage. Decoration strips can also be bought in various colors.
Plugin the electronic cables
Now the only step remaining in assembling your new Creality CR-10 is to connect the electrical wires and connections. An electronic box will have several cables in it that you need to connect to appropriate parts.
A plastic label on the cables will help you in informing where it needs to be connected. Mainly you will require to connect the extruder, motor, and heat bed with the electrical box. You also need to connect end stop cables to the opposite connector.
As soon as you have linked all the connections, you can connect the main power cable to the plug, and as you open the switch, the printer will start. LCD display of the printer will light up and will show you different settings and parameters of the printer.
You have now successfully assembled your new Creality CR-10 3D printer. To start printing projects, you need to perform a set of calibrations, and after that, you can build your first 3D print.
Hassan Khan
Hassan Khan is a leading voice when it comes to the innovative world of additive manufacturing. A mechanical engineer by training, Hassan quickly recognized the transformative potential of 3D printing, diving headfirst into the intricacies of printer design, filament research, and software optimization. At CrealityLovers.com, Hassan shares his profound knowledge, from insightful reviews and tutorials to forward-thinking op-eds that forecast the future of 3D printing. Hassan's commitment goes beyond the written word. Hassan Khan aims to empower every reader, from novices to industry experts, ensuring they make informed decisions in their 3D printing endeavors.