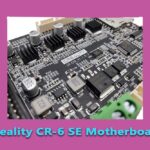
The CR-6 SE’s motherboard is one of the more distinctive boards Creality shipped: a proprietary 32-bit board (marked in the wild as the CR-ERA / V1.1.0.3 family) running soldered TMC2209 silent drivers, built around this printer’s signature feature — a strain-gauge levelling sensor in the hotend that lets the nozzle itself probe the bed. This guide identifies the board, explains what is on it, and covers the version discipline that CR-6 SE firmware demands — because this machine, more than most Creality printers, punishes the wrong board/firmware pairing.
The CR-6 SE board at a glance
| Item | Detail |
|---|---|
| Board family | Creality proprietary CR-6 SE mainboard, seen marked CR-ERA V1.1.0.3 (board markings vary by production run — read your own board) |
| Processor class | 32-bit (STM32 family) — a generation beyond the 8-bit ATmega boards of the CR-10S era |
| Stepper drivers | TMC2209, soldered (not socketed) — silent operation, not user-replaceable |
| Input voltage | 24 V |
| Levelling | Strain-gauge sensor in the hotend (via a small daughter board) — the nozzle is the probe; no separate Z probe on this model |
| Motors served | Single Z motor design with a belt-linked dual leadscrew arrangement — one Z driver does the work |
| Interfaces | Colour touchscreen (its own display board/firmware), microSD card slot, USB |
Why this board demands version discipline
Three features of the CR-6 SE conspire to make “close enough” firmware a bad idea. First, the strain-gauge levelling system — the board reads a delicate signal from the hotend’s sensor daughter board, and firmware built for a BLTouch machine has no idea what to do with it. Second, the touchscreen has its own firmware that must match the mainboard’s expectations; a mismatched pair shows up as a screen that boots but doesn’t communicate, or controls that lie. Third, board revisions exist within the model’s life — the CR-6 SE’s early production history included widely reported electrical teething problems that Creality revised its way out of, which is exactly why “a CR-6 SE board” is not a complete description of yours.
The working rules follow from that:
- Identify before you flash: read the version marking silkscreened on your actual board and match firmware to the board and to the machine — CR-6 SE firmware only, from Creality’s support for this model or a community build that names your board revision.
- Update the screen as a pair: if the release notes pair a mainboard firmware with a display firmware, do both in the stated order.
- Soldered drivers set the repair terms: a failed TMC2209 on this board is a board-level repair or a board replacement, not a five-minute driver swap — one more reason the fan and airflow around the control box matter (the fan roles are mapped in our cooling fans guide).
- Levelling faults are rarely the mainboard: the strain gauge and its little daughter board at the hotend, plus the cable between them, fail far more often than the mainboard does — check there before pricing a board.
Replacing the board
A like-for-like CR-6 SE board is the sane replacement: photograph every connector before unplugging anything (this board’s harness is dense), transfer one plug at a time, and use the old board as the physical map. After any board swap, re-run the printer’s full self-checks and a calibration pass — the levelling sensor’s behaviour is part of the board pairing, and our calibration walkthrough covers the routine checks that close the job. If your dead board is an early-revision unit, a later-revision replacement is the one silver lining the repair offers.
Frequently asked questions
What motherboard does the CR-6 SE use?
Creality’s proprietary 32-bit board for this model (seen marked CR-ERA V1.1.0.3), with soldered TMC2209 silent drivers and 24 V operation. It is designed around the CR-6 SE’s strain-gauge levelling and touchscreen, so generic Creality boards are not substitutes.
Are the CR-6 SE’s stepper drivers replaceable?
Not as plug-in modules — the TMC2209 drivers are soldered to the board. A failed driver means board repair or replacement, unlike the socketed-driver boards of the older CR-10 generation.
Can I flash Ender or CR-10 firmware on a CR-6 SE?
No. The CR-6 SE’s levelling sensor, touchscreen and board revision all require firmware built for this exact machine and board. Mismatched firmware ranges from a dead screen to a printer that cannot level — identify your board version first and flash only its matching build.
My CR-6 SE won’t level properly — is the motherboard dead?
Unlikely to be the first suspect. Levelling problems on this model usually trace to the strain-gauge sensor or its hotend daughter board, or the cable linking them. Check the sensor chain before condemning the mainboard.
Hassan Khan

Hassan Khan is a leading voice when it comes to the innovative world of additive manufacturing. A mechanical engineer by training, Hassan quickly recognized the transformative potential of 3D printing, diving headfirst into the intricacies of printer design, filament research, and software optimization. At CrealityLovers.com, Hassan shares his profound knowledge, from insightful reviews and tutorials to forward-thinking op-eds that forecast the future of 3D printing. Hassan's commitment goes beyond the written word. Hassan Khan aims to empower every reader, from novices to industry experts, ensuring they make informed decisions in their 3D printing endeavors.