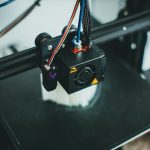
Calibrating your Creality Ender 3 Pro is a crucial step in achieving optimal performance and accurate prints.
As the largest Creality reseller in Canada, 3D Printing Canada understands the importance of providing top-notch after-sales support to its customers.
We are committed to helping you get the most out of your Ender 3 Pro by offering comprehensive guides and resources.
In this blog post, we will walk you through the step-by-step process of calibrating your Creality Ender 3 Pro without using points. By following these instructions, you can ensure that your printer is properly calibrated and ready to deliver exceptional 3D prints.
Understanding Calibration
Calibration plays a vital role in fine-tuning your 3D printer settings and components to achieve accurate movement and alignment during the printing process. Proper calibration helps eliminate issues like over-extrusion, under-extrusion, uneven layers, and misaligned prints. With the right calibration, you can unlock the full potential of your Ender 3 Pro and achieve impressive print quality.
Calibrating Your Creality Ender 3 Pro
Bed Leveling
To ensure proper adhesion and consistent first layers, it is essential to start with a leveled print bed. Follow these steps to level the bed of your Ender 3 Pro:
Begin by homing the printer and disabling the stepper motors. Manually move the nozzle to each corner of the bed, using a sheet of paper or a feeler gauge to adjust the distance between the nozzle and the bed. Aim for a slight resistance when sliding the paper. Repeat this process for all four corners until the nozzle is at the optimal distance from the bed.
Extruder Calibration
Accurate extrusion is critical for achieving consistent and precise prints. Here’s how you can calibrate the extruder of your Ender 3 Pro:
Heat the nozzle to the printing temperature of your filament. Mark a point on the filament about 120mm above the extruder. Using the printer’s control panel or software, extrude 100mm of filament. Measure the distance between the mark and the top of the extruder. If the measurement is not 20mm, adjust the flow rate in the printer settings until the correct extrusion length is achieved.
X and Y-Axis Calibration
To ensure smooth and accurate movement along the X and Y axes, follow these steps:
Manually move the nozzle to the far left and right of the X-axis, checking for any binding or resistance. Repeat the same process for the Y-axis, moving the nozzle to the front and back. If you encounter any issues, such as resistance or uneven movement, inspect for obstructions or loose belts. Adjust and tighten as necessary.
Z-Axis Calibration
Proper calibration of the Z-axis is crucial for achieving uniform layer heights and consistent prints. Here’s how you can calibrate the Z-axis of your Ender 3 Pro:
Print a calibration test object, such as a calibration cube or a benchy. Carefully examine the layers of the print. If they appear too squished or too far apart, adjust the Z-axis height in small increments until the layers are evenly spaced and aligned.
Retraction Settings
Retraction settings help minimize stringing and oozing during non-printing movements. Consider the following steps to calibrate the retraction settings:
Experiment with different retraction distances and speeds to find the optimal settings for your specific filament and print conditions. Print a retraction test object, such as a stringing test or a tower, and make adjustments to the retraction settings until stringing is minimized.
Conclusion
Calibrating your Creality Ender 3 Pro is essential for achieving exceptional print quality and performance. As the largest Creality reseller in Canada, 3D Printing Canada is dedicated to providing top-notch after-sales support to help you make the most of your Ender 3 Pro. By following the step-by-step calibration process outlined in this guide, you can ensure that your printer is properly calibrated and ready to deliver outstanding 3D prints. Take advantage of our expertise and unleash the full potential of your Ender 3 Pro today!

