Nail art has become an essential form of self-expression and creativity, with 3D designs taking the spotlight for their eye-catching appeal. Among the various styles of nail art, 3D flower nails created with acrylics stand out for their intricate details and lifelike appearance. This blog post will delve into the world of 3D flower nails using acrylics, providing insights on techniques, popular designs, and tips for achieving stunning results.
Understanding Acrylics in Nail Art
Acrylic nails are created by combining a liquid monomer and a polymer powder, resulting in a durable and versatile material. Acrylics can be shaped into a variety of designs, making them an ideal medium for 3D nail art. The versatility of acrylic allows artists to create intricate flower designs that pop off the nail surface, offering depth and dimension.
Why Choose 3D Flower Nails?
3D flower nails add a unique touch to any manicure, making them perfect for special occasions or simply to elevate everyday wear. Here are some reasons to consider 3D flower nails:
- Visual Appeal: The dimensionality of 3D designs captures light and attention, making your nails a focal point.
- Customization: You can personalize your designs with your favorite flowers, colors, and styles, creating a one-of-a-kind look.
- Durability: Acrylics are known for their strength, making 3D flower nails long-lasting compared to traditional nail art.
Essential Tools and Materials
Before diving into the creation of 3D flower nails, gather the necessary tools and materials:
Tools
- Acrylic Powder and Liquid Monomer: The base materials for creating acrylic designs.
- Acrylic Brushes: A variety of brushes (small, medium, and detail brushes) will help in sculpting the flowers.
- Nail Forms or Tips: Use forms or tips to provide a base for your acrylic nails.
- Dappen Dish: For mixing your monomer and acrylic powder.
- Dotting Tools: Useful for creating small details on your flowers.
Materials
- Base Coat and Top Coat: Essential for protecting and sealing your design.
- Nail Color: Choose your base color for the nails.
- Nail Art Decorations: Optional embellishments like glitter, rhinestones, or foil to enhance your design.
Step-by-Step Guide to Creating 3D Flower Nails
Creating stunning 3D flower nails may seem intimidating, but with practice and patience, you can master the technique. Follow these steps to create your own 3D flower nails using acrylics:
Step 1: Prepare Your Nails
Start by preparing your natural nails:
- Clean and Shape: Remove any old polish, clean your nails, and file them to your desired shape.
- Push Back Cuticles: Gently push back your cuticles to create a clean workspace.
- Apply Nail Tips or Forms: If using nail tips, apply them with nail glue. If using forms, place them carefully under your natural nail.
Step 2: Apply the Base Color
- Apply Base Coat: Start with a clear base coat to protect your natural nails and enhance adhesion.
- Color Application: Choose a nail color that complements your floral design. Apply two coats of polish, curing between each layer if using gel.
Step 3: Mix Acrylics
- Prepare the Acrylic: In a dappen dish, mix the liquid monomer with the acrylic powder to create a workable bead.
- Consistency: Aim for a consistency that is not too runny or too thick—just enough to sculpt without losing shape.
Step 4: Sculpting the Flowers
1. Create Flower Petals:
- Dip your brush in the acrylic mixture and pick up a bead.
- Place the bead on the nail where you want to create the flower.
- Using the brush, shape the bead into a petal. Start from the center and work your way out, making the edges thinner for a natural look.
- Repeat this process, adding beads to form more petals around the center.
2. Add the Flower Center:
- Use a smaller bead to create the center of the flower. This can be a contrasting color for added visual interest.
- Shape it into a dome to give depth.
3. Layering:
- For a more dimensional look, layer additional petals on top of the first layer, ensuring they are staggered for a natural appearance.
Step 5: Adding Details
- Detailing: Once your flowers are sculpted, use a detail brush to add finer elements, such as veins or texture to the petals.
- Color Accents: Use colored acrylics or a fine brush with gel polish to add accents like highlights or shadows, enhancing the depth of your flowers.
Step 6: Finishing Touches
- Curing: Allow the acrylic to fully set. This usually takes about 5-10 minutes.
- File and Shape: Gently file the edges to smooth out any rough spots and shape your nails to perfection.
- Top Coat: Apply a top coat to seal your design and add shine. This will also protect your artwork from chipping.
Popular 3D Flower Designs
To inspire your creativity, here are some popular 3D flower designs you might consider:
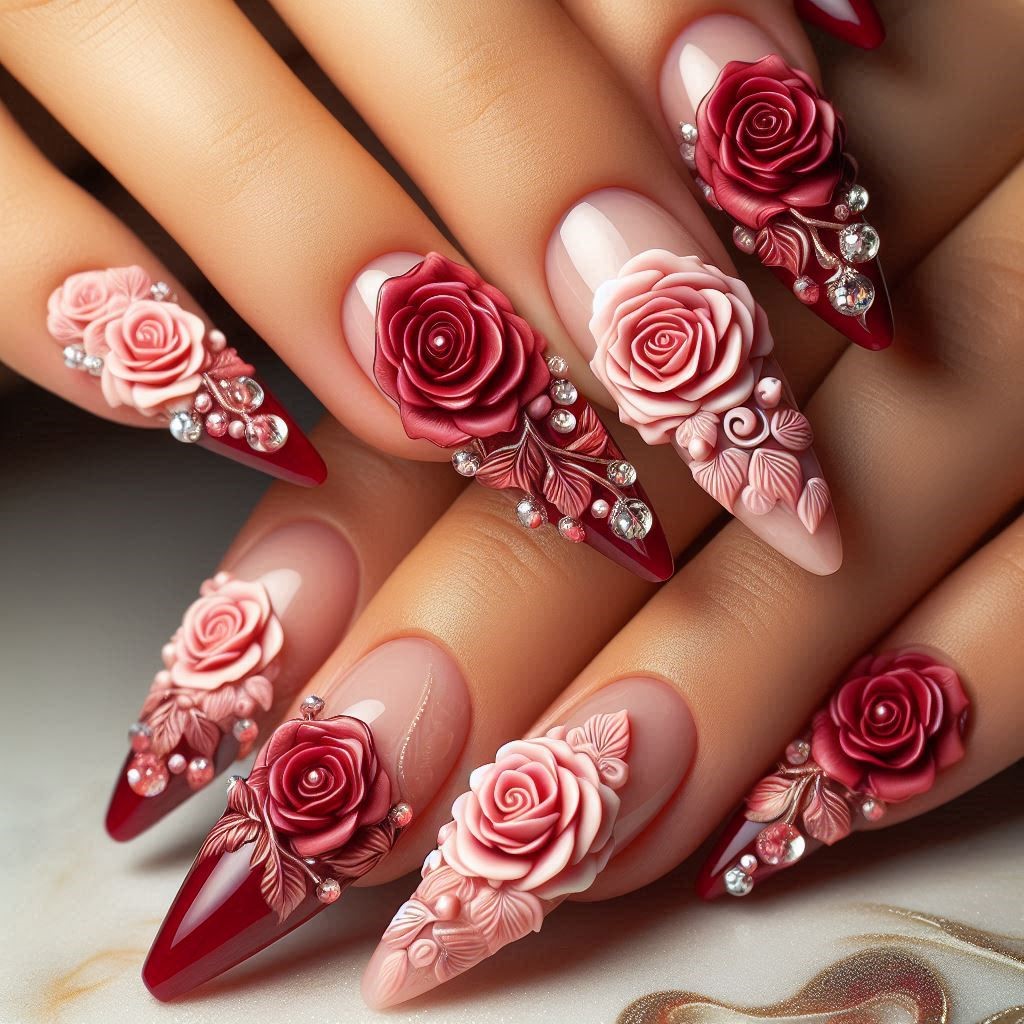
1. Roses
Classic and romantic, roses can be created in various colors. Their layered petals give a stunning, lifelike effect.
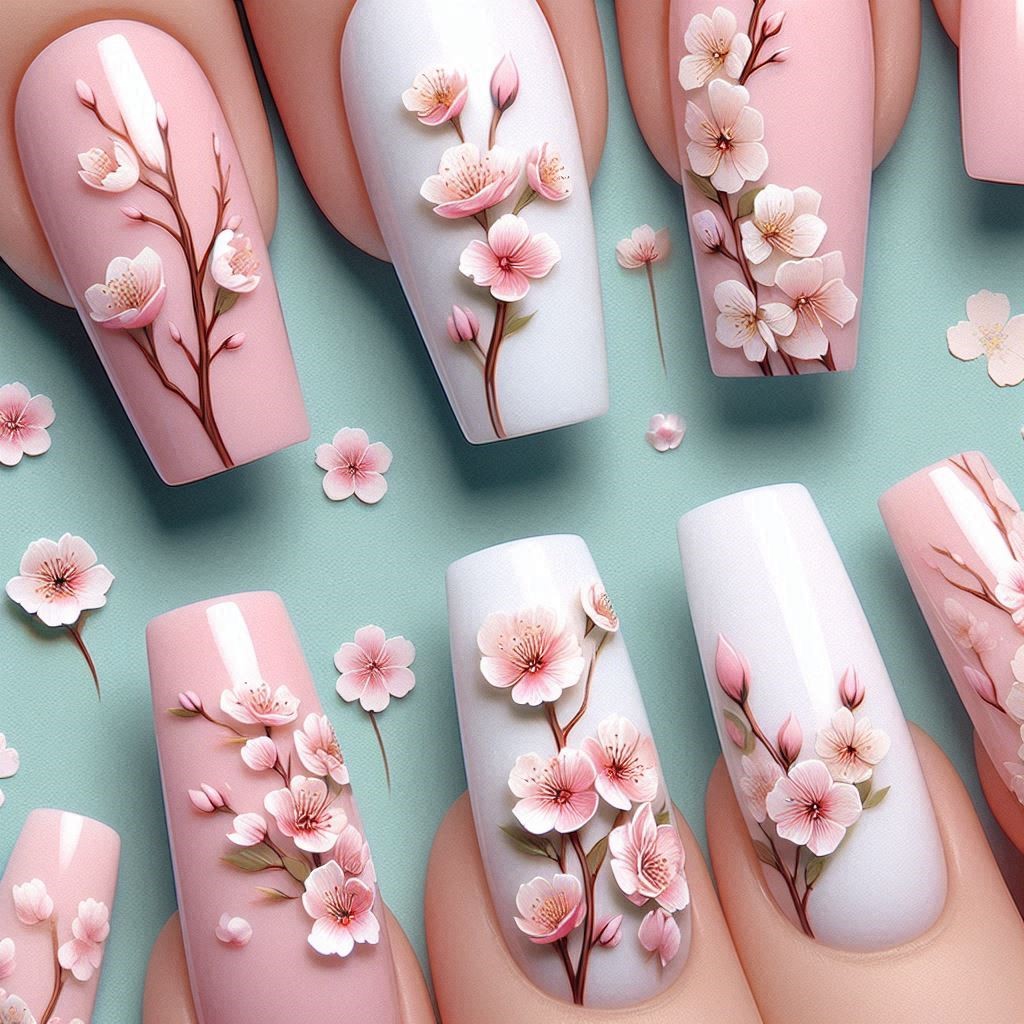
2. Cherry Blossoms
These delicate flowers, with their soft pink hues and simple shapes, offer an elegant touch, perfect for spring-themed nails.
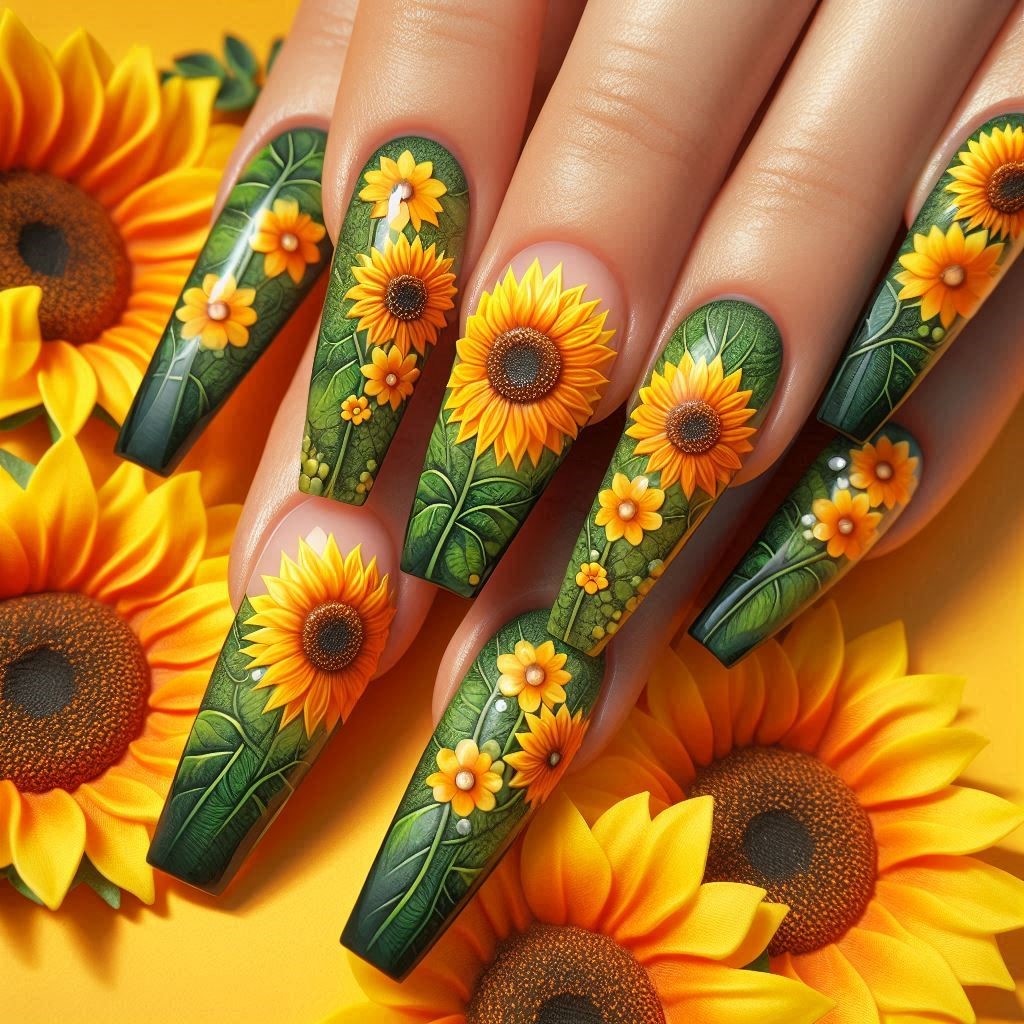
3. Sunflowers
Bright and cheerful, sunflowers can be created with vibrant yellow petals and a dark center, making a bold statement.
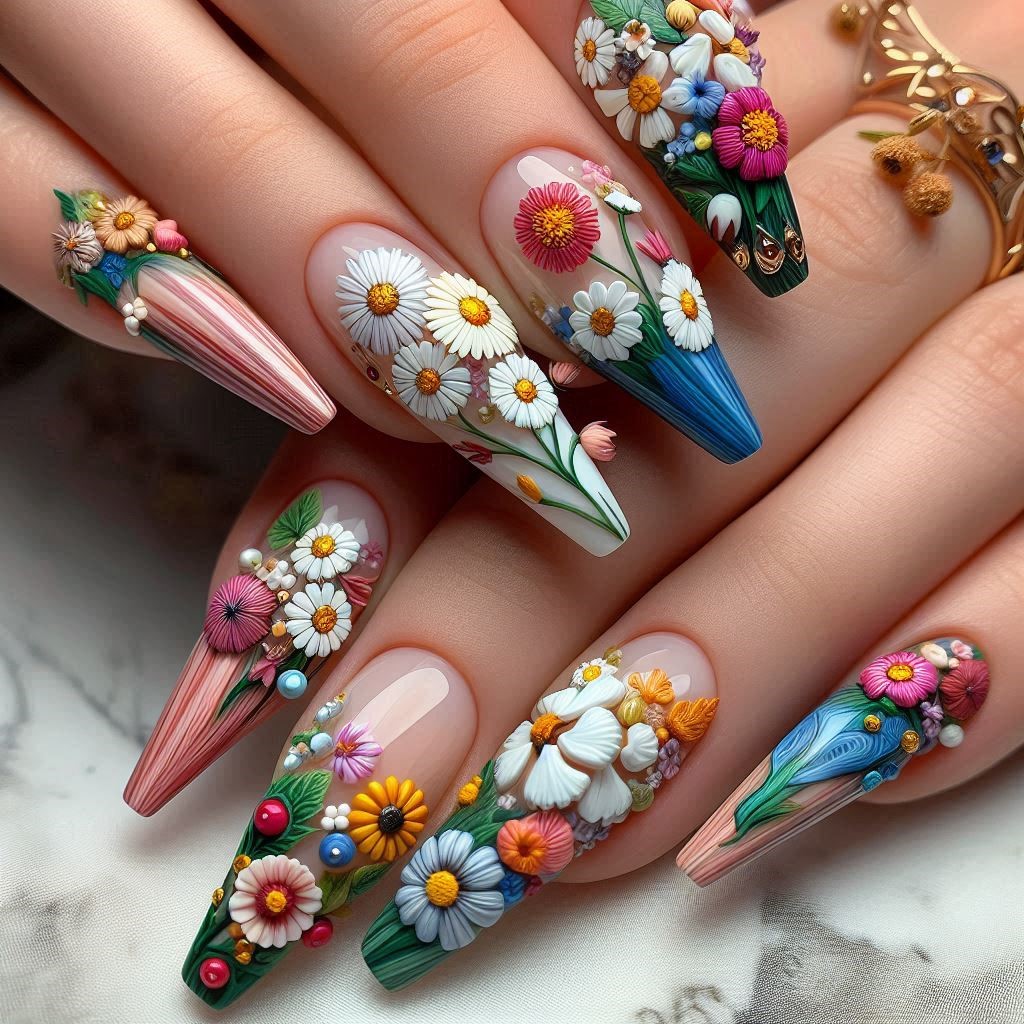
4. Daisies
Simple yet beautiful, daisies add a fresh and clean look. Their white petals with yellow centers are easy to create and universally loved.
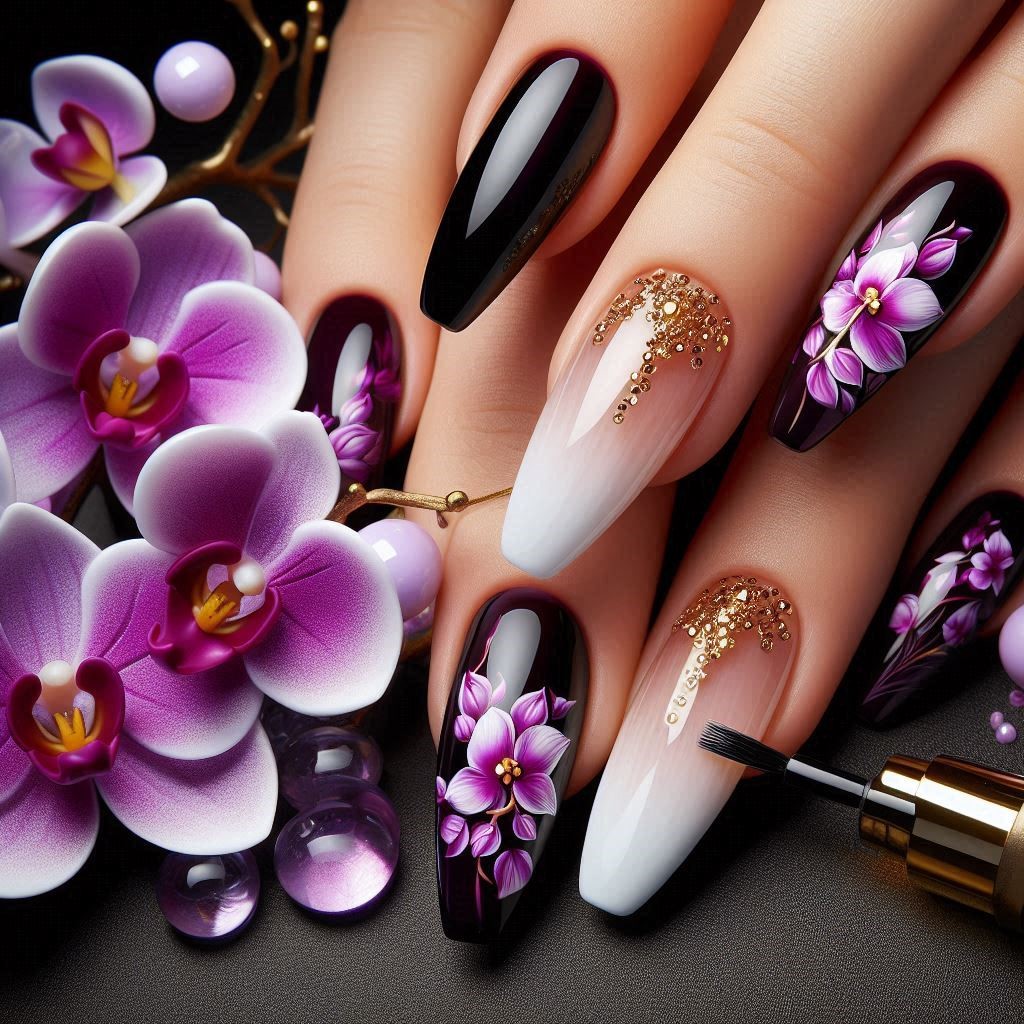
5. Orchids
For a more exotic touch, orchids can be intricately designed with a mix of vibrant colors and detailed petal shapes, showcasing artistic skill.
Tips for Successful 3D Flower Nails
Achieving beautiful 3D flower nails requires practice and attention to detail. Here are some tips to enhance your nail art journey:
1. Practice Makes Perfect
If you’re new to acrylics, practice on a nail wheel or practice nails before applying your designs to your own nails. This helps build confidence and skill.
2. Experiment with Colors
Don’t be afraid to mix colors and try new combinations. Floral designs can be vibrant and bold or soft and subtle—find what resonates with your style.
3. Invest in Quality Tools
Using high-quality brushes, acrylics, and tools can make a significant difference in the outcome of your designs. Quality products yield better results and are easier to work with.
4. Take Your Time
Creating intricate 3D designs takes time. Rushing can lead to mistakes. Allow each layer to dry and set before moving on to the next step.
5. Finish with a Top Coat
Always seal your design with a top coat. This not only adds shine but also protects your artwork from damage and wear.
Conclusion
3D flower nails using acrylics offer a beautiful way to express creativity and elevate your nail art game. With the right techniques, tools, and a touch of imagination, you can create stunning designs that showcase your unique style. Whether you prefer the elegance of roses or the whimsy of wildflowers, 3D floral nails are sure to turn heads and bring joy. So, gather your supplies, unleash your creativity, and let your nails bloom!
Hassan Khan
Hassan Khan is a leading voice when it comes to the innovative world of additive manufacturing. A mechanical engineer by training, Hassan quickly recognized the transformative potential of 3D printing, diving headfirst into the intricacies of printer design, filament research, and software optimization. At CrealityLovers.com, Hassan shares his profound knowledge, from insightful reviews and tutorials to forward-thinking op-eds that forecast the future of 3D printing. Hassan's commitment goes beyond the written word. Hassan Khan aims to empower every reader, from novices to industry experts, ensuring they make informed decisions in their 3D printing endeavors.